Last Updated: June 3, 2026
Link to Feature: https://app.fireflyreservations.com/Integrations (or click here)
Quick Links: Explore the topics below to quickly find the information you need!
Things to know before connecting
Setup Steps:
- Enable the Add-on
- Sync Available Units
- Set up your Airbnb Rates
- Set Min/Max Night Rules
- View Other Settings and Date Ranges in the Inventory Tab
- Create your Channel
- Map your Units
- Activate your Channel
- Pull Future Reservations
View Airbnb Reservations in Firefly
Things to know before connecting
IMPORTANT: To complete the Airbnb integration, the units you will connect must be set up in both Firefly and Airbnb, and must be published for bookings on your Airbnb account.
Unit Types – Only lodging type units in Firefly are eligible to link to your Airbnb Account.
Check Airbnb Requirements - Airbnb has some local laws and requirements for parks to meet and to be in accordance with. Before being able to utilize our integration, please check to make sure that you meet them.
Set up your Airbnb Account - This Airbnb help article can walk you through getting your Airbnb set up: Set up your Airbnb Account. You should set up your Airbnb account before proceeding.
Confirm Currency in Firefly - Your currency needs to be properly configured in Firefly before connecting any units through the OTA Channel Manager. This can be found by navigating to Settings > Property > General tab > Currency.

Pricing – For up-to-date pricing on this integration in Firefly, see: Airbnb integration pricing.
Step 1: Enable the add-on
To enable the Firefly OTA Channel Manager add-on, navigate to your Account Manager.
- Click on the user profile's name in the top right corner of any page in Firefly, select ‘Account’.

- This is the Account Manager. Select the ‘Addons’ tab.

- Check the box for the OTA Channel Addon option from the available add-ons and select ‘Save’ at the bottom of your screen to save your changes.

- After this account add-on is enabled and saved you will see the OTA Channel Manager in the Integrations settings (formerly, Channel Manager).
On the main menu, click Settings dropdown > select Integrations

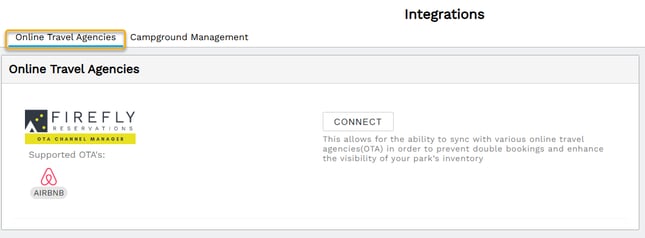
Step 2: Sync available units
- From Firefly's main menu, go to the Settings dropdown > Integrations (formerly, Channel Manager)

- Select ‘Manage’ to the right of the Firefly OTA Channel Manager.

- Select the units you would like to sync from the list of available units then save your selection.

IMPORTANT: Only 'Lodging' type units will show as available options in this list.
After this step is completed, select 'Channel Setup'.

Step 3: Set up your Airbnb Rates
You can set up rates for integrated units once your Airbnb account is linked to your Firefly account in Integration settings (formerly, Channel Manager).
Airbnb rates for integrated units are now managed in the Firefly OTA Channel Manager. You will not manage rates in Airbnb for any unit integrated with Firefly.
Reservations made through Firefly use the rates set in Firefly's Units settings.
IMPORTANT: Units in Airbnb appear unavailable unless rates are set up in the Firefly OTA Channel Manager, so we recommended setting up rates before moving on to the next steps.
Here is a quick recap to access Firefly's OTA Channel Manager... from the main menu, go to Settings > Integrations > Online Travel Agencies tab > Channel Management button > Channel Setup button > Inventory tab.
On the Inventory tab, click the ‘Actions’ dropdown then select ‘Bulk Update’.

Select a date range and the days of the week you are adjusting rates for. Ensure all days of the week are selected if you want the rates to apply to all days in the date range. If desired, you may choose to apply rates only to specific days of the week using the checkboxes, shown here.

An example for applying different rates on specific days of the week is using weekday and weekend rates. For example, if adjusting rates for Fridays and Saturdays only, you will uncheck Sunday through Thursday. Then keep Friday and Saturday selected and finish the rate process outlined below. When the process is done for these weekend days, you will you will uncheck Friday and Saturday and select Sunday through Thursday. Completing the same process below for the rest of the days of the week.
Select the setting you want to update – in this case, check the ‘Rate’ box and enter the daily rate in the box to the right. Then select the unit to apply the rate below in the ‘affected rooms’ section.

When you are done, click the ‘Save’ button at the bottom of the page.

You will see the rate reflected under the dates that you updated.
TIP: To ensure you do not miss any dates, we suggest completing rate for a larger time frame then adding the special rates as needed. For example, enter rates for a year or your season before entering specific date ranges like special events, weekends, or holidays.
After establishing your connection to your Airbnb account, you will have limited access to pricing and availability settings from the Airbnb side. However additional fees for Airbnb (Housekeeping, pet fees, etc.) will still be managed in your Airbnb account.


NOTE: The images above are from Airbnb’s hosting site and are subject to change.
Step 4: Set Min / Max Night Rules
Go to Settings > Integrations (formerly, Channel Management) > Manage.

Select ‘Channel Setup’. You will find this below the list of units.

On the Inventory tab, click the ‘Actions’ dropdown then select ‘Bulk Update’.

Enter the Affected Dates, this is the date range the minimum setting will be valid for.
 Then select a minimum stay restrictions type: ‘Min Stay Arrival’ or ‘Min Stay Through’, then enter your nightly minimums. More information about
Once you enter your minimum stay, select the units this minimum applies. If it applies to all units then check ‘Select All Rates’ and select ‘Save’.

Understanding Airbnb Terms Related to Firefly Reservations:
- Min Stay Arrival: This setting requires the minimum stay to be based on the guest’s check-in date only.
- Min Stay Through: This setting requires the guest to meet the minimum stay for any date within the entire booking period, regardless of their check-in date.
If you have the following minimums:
- Sunday to Friday: 1-night minimum stay
- Saturday: 3-night minimum stay
Here’s how each setting would apply:
- Min Stay Arrival: If a guest is arriving on Friday (with a 1-night minimum), they can stay just 1 night. The 3-night minimum for Saturday only applies if the guest arrives on Saturday.
- Min Stay Through: If a guest is booking from Thursday to Saturday, they must book a minimum of 3 nights, since Saturday requires a 3-night stay.
IMPORTANT: The option you choose to apply minimum nightly rules in the bulk update MUST match the connection setting in your channel's setup. Be sure you choose the same restriction type when you create your channel below. If your channel is already created, ensure the settings for inventory and channel match.
.

Step 5: View Other Settings and Date Ranges in the Inventory Tab
To view the current settings of your Airbnb integration in Firefly, go to Settings > Integrations > Management button > Channel Setup button > Inventory tab.
You can display multiple settings in the Inventory view using the Rate and Availability dropdown.
 Click the dropdown and select the desired setting you wish to include in the inventory view. You will then see a new row appear between Availability (AVL) and Rates (Rates). Setting titles abbreviated, as we see here with Min Stay Through displaying as MST.
To view a different date range, select the arrow on either side of the date to scroll or click on the date to select a new date range from a calendar.

Step 6: Create your Channel
Navigate to the Channels tab and select Create.

Select ‘Airbnb’ from the dropdown and create a title name for your channel. We recommend your park name followed by Airbnb.

NOTE: This channel name is only visible to you in your Channel Manager. It is not customer-facing.
Here you can also select the ‘Min Stay Type’.

IMPORTANT: The Min Stay Type must match in both Inventory settings AND channel setup in order to apply. Definitions for these types as well as directions for the inventory setting can be found in Setting up Min / Max Night Rules above.
Once these settings are updated you can select the “Connect with Airbnb’ button at the bottom of the page.
The Airbnb host account that is the ‘Listing Owner’ should be the account that is connected for the listings to show and be mapped in the next steps.

This will navigate another webpage outside of Firefly to establish your connection.
You will need to log into your Airbnb host account if you are not already and accept the Terms and Conditions to establish your connection.

Once connected you can select ‘Save’ at the bottom of the page.

You will then see your channel created under the Channel tab.
The status will show as disabled until you are ready to activate your connection (We will do this in a later step)
Step 7: Map Your Units
From the actions dropdown select ‘Edit’.

Then select the ‘Mapping’ tab along the top of the page. Here you will map each connected unit in the Channel Manager with a listing in Airbnb. This will be a 1:1 relationship. This view will also show the one or multiple properties you connected to the channel.

Click on the red ‘Not mapped’ option and connect the unit to the unit in your Firefly Park that matches the listing.

Once this is selected click ‘Save’.

Once this is connected you can then see the mapped unit in your ‘Mapping’ tab linking the two units.

Step 8: Activate your Channel
After you have mapped your units and are ready to activate your connection, select the Actions dropdown on the channel tab and select ‘Activate’.


You can then see the status has been updated to ‘Active’.

Step 9: Pull Future Reservations
After activating your channel, you will also need to pull future reservations to sync both platforms to show existing reservations.
Select the ‘Actions’ dropdown and ‘Pull Future reservations’ option.

Note: Once the initial sync is completed, any future reservations that are pulled in from external booking sources are subject to Firefly’s standard reservation fees, just like reservations made directly through Firefly.
View and Manage Airbnb Reservations in Firefly
Airbnb reservations will show the Airbnb logo on the grid as shown below.

- Charges and payments are handled by Airbnb much like reservation dates, so any unit charges created in Firefly for reservations made in Airbnb are not editable. You cannot make payments or edit the charge in Firefly - this must be done on Airbnb.
- Via Settings > Units > (Unit Selected) > “Allow external booking channel reservations only” (checkbox)

This option allows for a specific unit to only be booked via Airbnb or other external booking platforms, but not through Firefly. If a reservation is attempted anywhere through Firefly for a unit with this enabled, an error will appear stating that the “Unit only allows bookings from external booking channels”.
Conflicts
- Through the main Firefly dashboard, you'll now be able to view any reservation conflicts. While this is very unlikely, it may occur if a block or reservation is made in Firefly for the same dates that are being requested on Airbnb, at the same time.
- From the dashboard, you can select the conflict, which will direct you to the conflicting Airbnb reservation. From there, you can access the related Firefly reservation or block and make any required adjustments. Once the changes are made and the conflict is resolved, simply click the 'Conflict has been resolved' button.


Disconnect Airbnb
You may disconnect the entire property or just specific units. Follow the directions below for either option.
To disconnect the property:
- Go to Settings > Integrations > Online Travel Agencies tab > Select ‘Manage’ next to the connection

-
Scroll to the bottom of the page and select the blue "Channel Setup" button.

- From the Channels tab, select the Actions dropdown to the right of the Airbnb channel. Select either ‘Deactivate’ or ‘Remove’.
- "Deactivate" is pauses integration activity. All setup and settings remain but the active connection is put on hold.
- "Remove" will delete all setup currently in place. If you remove the channel and wish to reestablish the integration, it will have to be rebuilt from scratch.

- Click "Back to Channel"

- Click red "Disconnect Property" button.

To disconnect a unit:
- Go to Settings > Integrations > Online Travel Agencies tab > Select ‘Manage’ next to the connection

- Scroll to the bottom of the page and select the blue "Channel Setup" button.
- From the Channels tab, select the Actions dropdown > Edit.

- Go to the Mapping tab. Find the unit you desire to remove, click the "trash can" icon.

- Click Save to complete the disconnection of the unit from Airbnb.

- If desired, you may remove the unit from integration in Firefly entirely. Click on the X in the upper left corner of the pop up then select Back to Channel.
 Uncheck the unit then click Save.
Need a walkthrough training to get your Airbnb integration set up in Firefly? Schedule a dedicated call here: Firefly's Airbnb Advanced Training with Krystal