Make accounting easier by setting up your chart of accounts. Assign your charges, payment methods, taxes, POS, and utilities to the general ledger codes you already use in QuickBooks or your accounting package.
Giving the Accounting Permissions
The first step to using the cash based accounting feature is giving the correct users the accounting permissions. The only people who can update permissions are the Account Administrators on your Firefly account. These are the people who receive the Firefly invoice each month, and can access Firefly account information. This person can go to Settings -> Users, then they can update each users permissions. Click into the correct person, and check off the accounting permissions. The user may need to log out of Firefly, and then log back in to see the accounting settings. Click your name at the top right and logout. Firefly Support can also update permissions if needed.
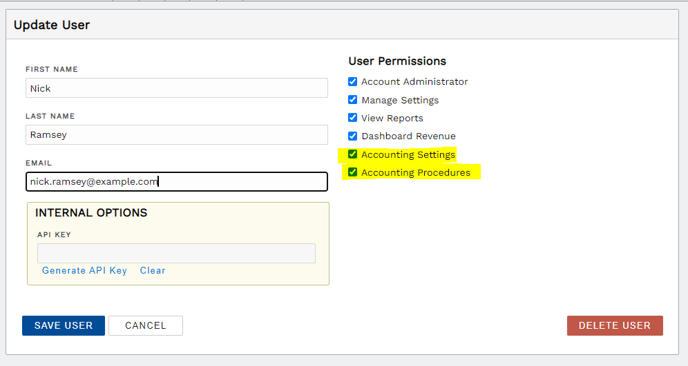 Update user permissions
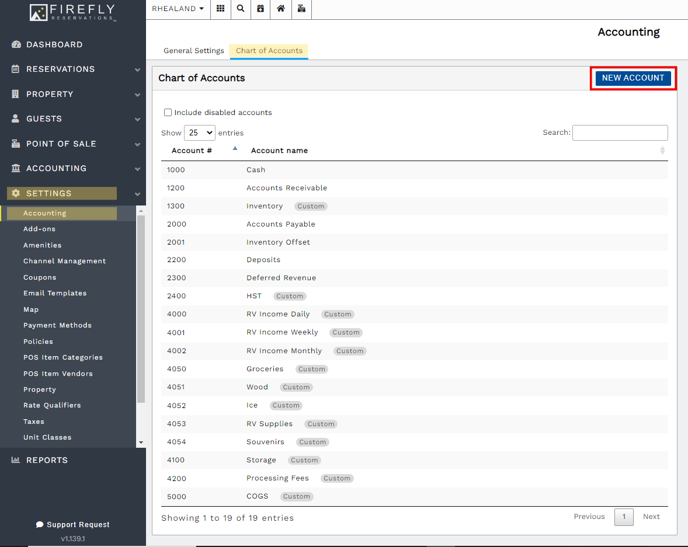
Adding your Chart of Accounts
Now, you are ready to setup your cash based accounting. To add your Chart of Accounts go to Settings > Accounting > Chart of Accounts. You will find a set of default accounts that are necessary to have in the system (Cash, Accounts Receivable, Accounts Payable, Inventory Offset, Deposits, Deferred Revenue). You can change the numbers/names of these accounts by clicking to edit. To add a new GL account, click on New Account.
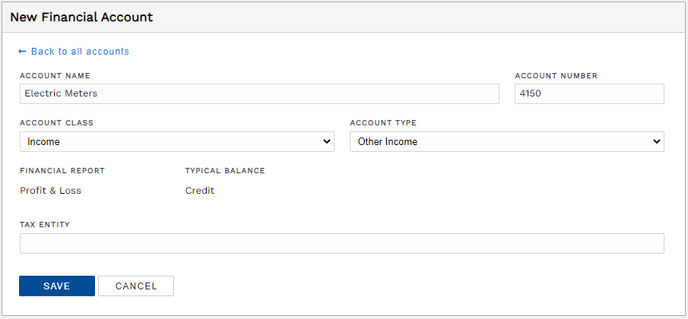
Fill out the information listed, and choose the appropriate account types. If you are setting up a GL account that will be linked to a tax code, enter the Tax Entity name the same way it is in QuickBooks.
Note: the export does not require the account class or type in Firefly to match the account class or type in your accounting package.
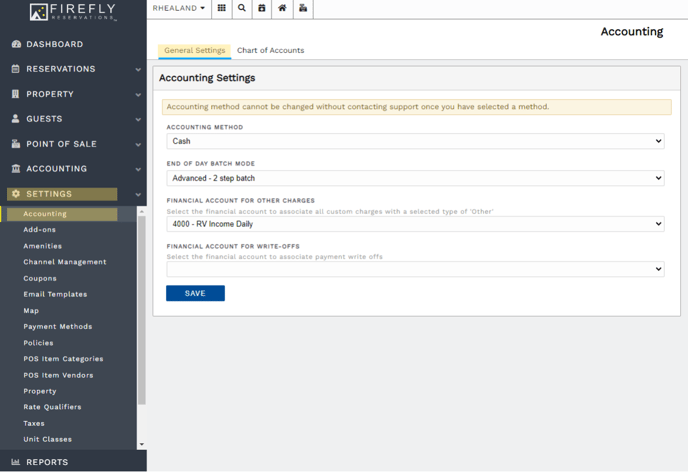
General Settings
Once your Chart of Accounts is ready to go, configure your General Settings under Settings > Accounting > General Settings.
Cash is currently the only accounting method available.
End of Day Batch Mode:
Simple - 1 Step Batch: Creates journal entries for payments and revenue in one step. Payment reconciliation is not necessary to proceed and therefore no write off account can be set up.
Advanced - 2 Step Batch: Creates journal entries first for payments through a payment reconciliation. Debits the payment GL code(s), and credits a Deposits account. Once the payments have been reconciled, journal entries for transaction revenue are created. At this time the Deposits account is debited, and the revenue/liability accounts are credited. A write off account is available for when the till is over/under.
Linking Your Financial Accounts
Each payment method and charge item will need to be linked to its own financial account. On the General Settings in the previous step, select an account for "Other Charges" which are charges made on the fly under the Charges tab.
These following areas will need to be linked to a financial account if in use:
- Payment Methods
- Taxes
- Units
- Reservation and Processing Fees
- Add-ons
- Coupons
- POS Categories / POS Items
- Utilities
Payment Methods
Each payment method that you will be using must have a financial account attached. You can choose to have all payment methods go into the same GL account or you can separate payment methods by different account numbers if desired.
To link a financial account to a payment method go to Settings > Payment Methods. Click the three dots next to the payment method you wish to work with, and choose Edit.
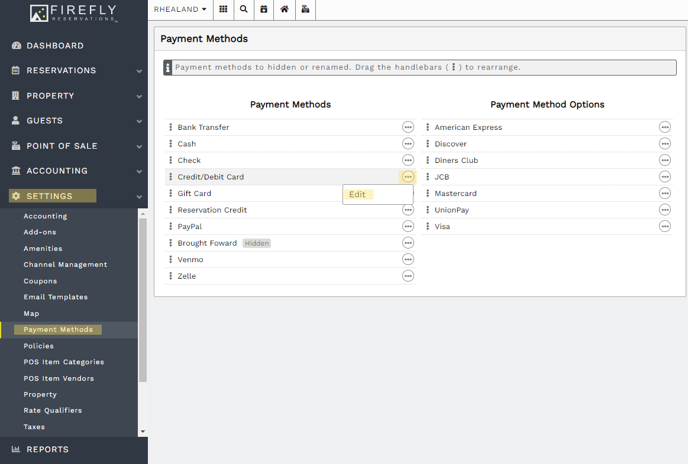
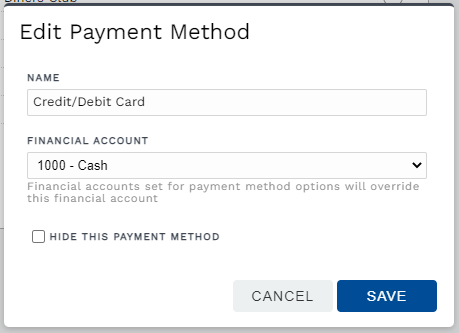
Note: You can also link different financial accounts to each credit card type. If done, this will override the default account selected for Credit/Debit.
Taxes
Taxes can be assigned to the same GL account code or be separated into different accounts. If you would prefer to have a breakdown of how much of each tax has been collected, separate accounts are recommended.
To assign a financial account to your tax code, go to Settings > Taxes. Click on the tax, choose accordingly, and click Save.

Units
To set a financial account to the units, go to Settings > Units, and click on the unit you wish to start with. At the bottom of the screen, select the appropriate GL code and click save. You are able to Export the financial account to other units by using the Export/Import feature under Options on the top right of the screen.
The financial account associated with the unit under the General tab will collect revenue for all lengths of stay. Revenue for additional guests, pets, and vehicles will also be linked to the financial accounts selected here.
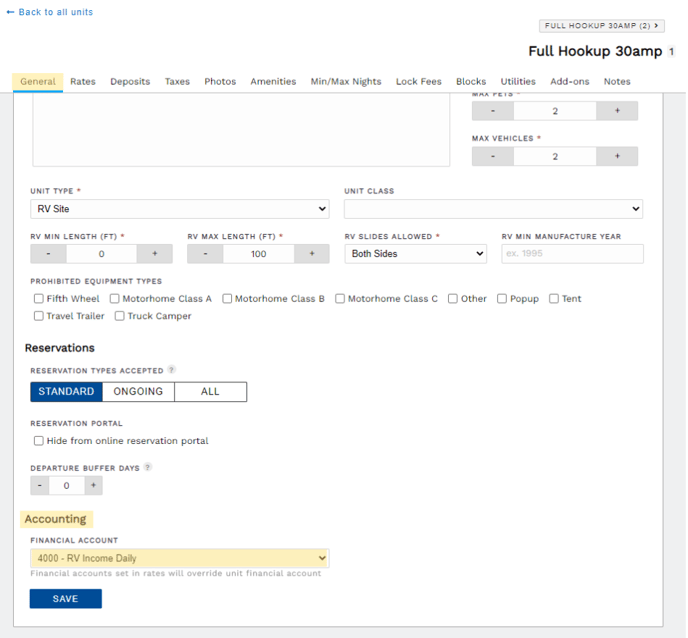
To separate revenue into different GL codes based on daily, weekly, monthly or seasonal rates, click on the Rates tab. Click the three dots next to the rate, and choose Edit.
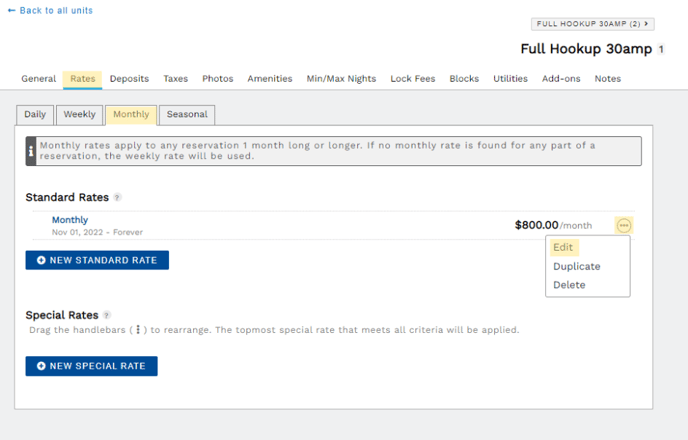
Choose the financial account associated with that particular rate from the drop-down on the bottom right and click Save.

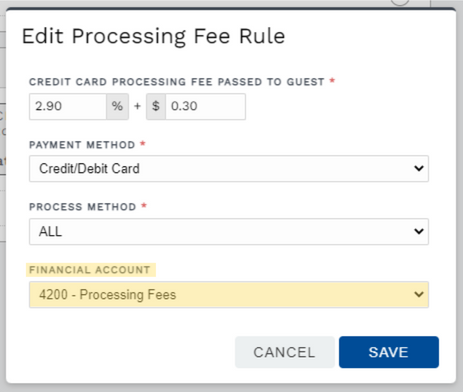
Reservation and Processing Fees
To link a financial account to your reservation and processing fees, go to Settings > Property > Fees. Click on the three dots next to the fee you want to assign an account to, and select Edit.
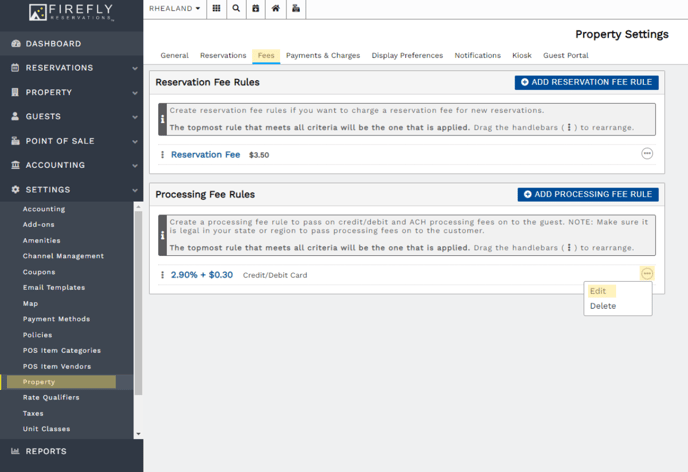
Select the GL code that you want to assign, and click Save.
Add-ons
Each add-on has the ability to be assigned to the GL code of your choice. To assign an account to an add-on, go to Settings > Add-ons. Click on the add-on for your choice,
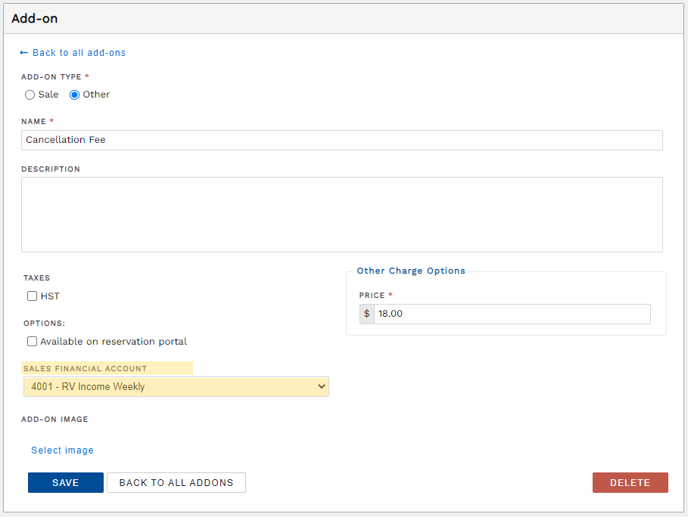
For add-ons that are classified as a "Sale" type have the inventory tracking turned on, you are able to also select an Inventory account (asset for what you have on hand) and a Cost of Goods Sold account (for the expense to wash through when sold).
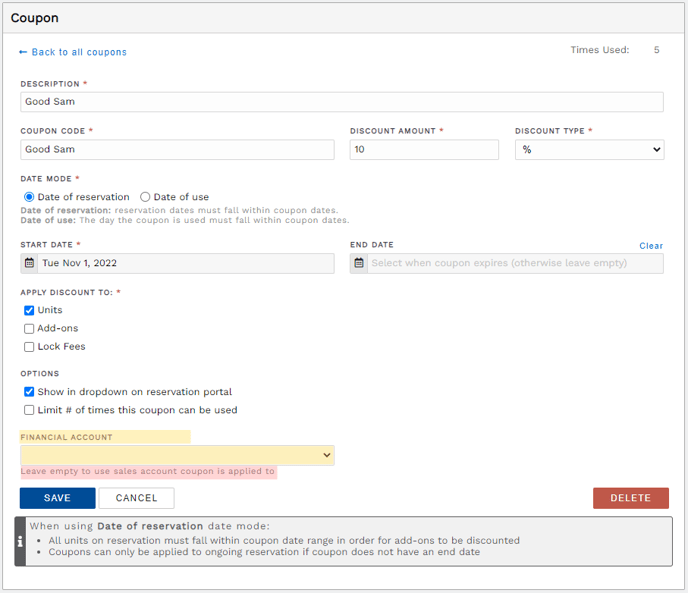
Coupons
Coupon codes do not have to be linked to a special financial account. If no expense account is selected, the amount of the discount will come out of the sales account that the charge is associated with.
To link an expense account to a coupon, go to Settings > Coupons. Click on the coupon code, choose accordingly and click Save.
POS Categories / POS Items
If you are using POS Categories to group your POS items together, set the financial accounts on those first. You can edit individual items afterwards if you want them going into a different account than the category default.
To add your Sales, Inventory, and COS (Cost of Sales/Cost of Goods Sold) account codes to the POS Categories, go to Settings > POS Item Categories. Click on the category, and assign accordingly.

Note: The COS and Inventory accounts will not be affected if the item does not have a cost (how much the park pays for the item) entered on the POS Item setup screen.
If you don't use categories or would like a specific item to be assigned to a different GL code than the category default, first pull up the item by going to Point of Sale > Point of Sale Items, and clicking on the item.
On the right-hand side, assign the accounts as needed and click Save at the bottom. This will override the category settings.

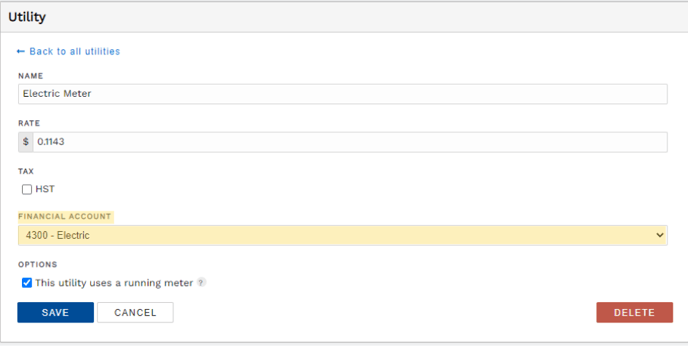
Utilities
To assign a financial account to a utility charge, go to Settings > Utilities. Click on the utility you want to assign, and change the financial account to where you want the revenue to go. Click Save when finished.
You can now use the accounting feature and run your Accounting End Of Day Procedure. You can post your payment and revenue numbers into the linked financial accounts, get journal entry based reports, and create a transfer file to easily import your data into QuickBooks!